October 7,2021
Magento 2 Guide: Adding a Product Category
If this is your first time using Magento 2, you may be confused as to all the options and what to do, even if you’ve used Magento 1 previosuly, you may not be sure of where everything has moved to.
We’re going to talk you through the basic building blocks to get your Magento 2 store started and be looking over the basics you need to set up a category.
Adding a category
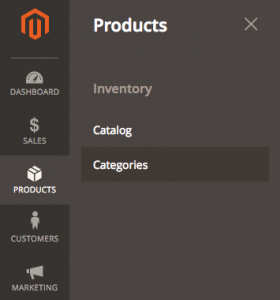
You can start setting up categories by clicking on Products section on the right, then the Categories section.

Once you’re here, we can then look at adding categories, you’ll see an option to add either a root category, or subcategory, let’s take a look at what these are.
Need help with Magento?
We are experts in Magento, with experienced designers, developers & marketers. If you need a hand, get in touch.
About Categories
What is a Root Category?
When you add a root category, this will become a new top level category. You will likely use this as your starting point of your website structure that all other categories will sit under, you normally have one to start with that says Default Category.
What is a Subcategory?
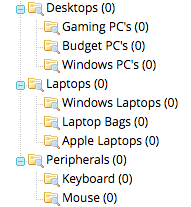
A sub category is a category, that sits inside another category, we so you could have for example:

There is no limit to the amount of subcategories you can have, but to make navigating the website easier, try not to go too deep with them, we’d normally advise no more than three subcategories.
Now that we know what these will both do, we’ll add our first category.
The setup of both is exactly the same and you can drag and you can reorder categories at anytime.
So let’s click add Subcategory, once the page has loaded, ensure the top two sliders are checked to yes, these will allow your category to be seen on the front end of the website.
Need help with Magento?
We are experts in Magento, with experienced designers, developers & marketers. If you need a hand, get in touch.
Adding a name and description
Under the two sliders, you can add the name of your category, use an appropriate name, we’ll be naming ours Laptops.
Your top section should now look like this.

Next expand the content tab, here you’ll be able to add a category image, which will you will see when viewing the subcategories (this does depend on how your store is set up).
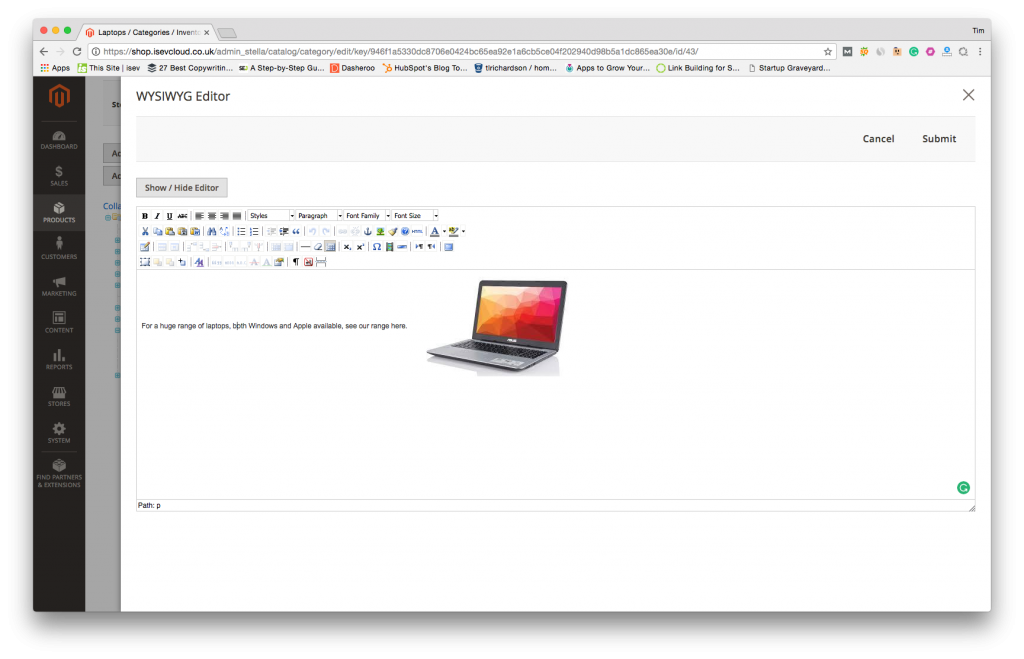
Click the WYSIWYG button to be able to style your category description, as you would do in word processing applications such as Microsoft Word, with text, images videos etc.

Need help with Magento?
We are experts in Magento, with experienced designers, developers & marketers. If you need a hand, get in touch.
Include meta details
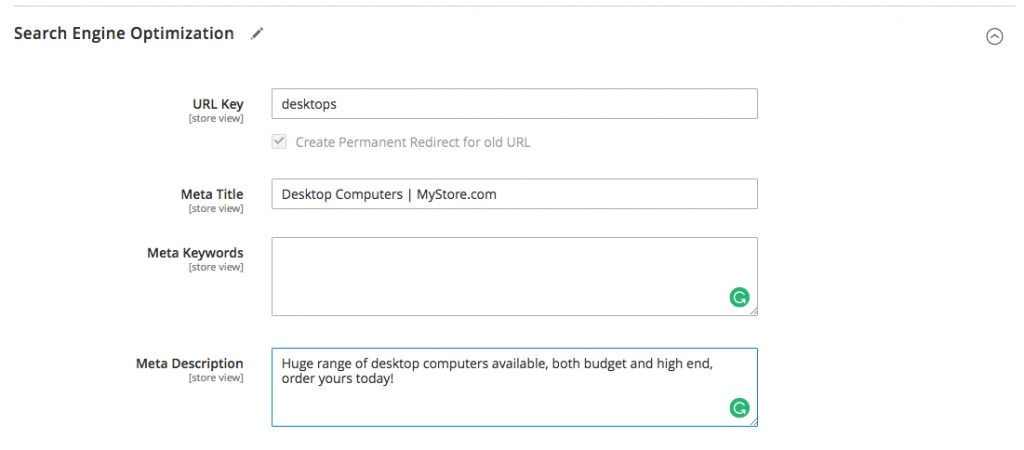
Now expand the search engine optimisation tab.
Here you’ll see a few boxes to enter.
URL key: How your URL will display, if you leave it blank, by default, it will use the category title – www.mystore.com/laptops
Meta title: When your page shows up in search engine results, this will be the title that people see.
Meta Description: The description of the page in search results.
Meta Keywords: Popular search engines don’t use these and can be ignored.

These are the basics you need to add a category, when your done, click save in the top right.
Well done, you’ve just added your first Magento 2 category
We are a experienced Magento Agency, working with brands both large and small. If you need any help with your Magento Store, get in touch with us today!


